Trac Install Guide
Trac has been around for a long time. I was using it before git existed. It's been stable and reliable all this time. Unlike all the big bloated tools out there these days like GitLab and Jira, Trac runs quite well on the cheapest virtual servers you can rent.
Originally published at dev.to
PLEASE NOTE
Before you email with a question, this guide is not up to date, and will not be updated.
Since I was documenting the process anyway, why not make my first post with dev.to a software install guide.
Trac is my favored project management environment
Trac has been around for a long time. I was using it before git existed. It's been stable and reliable all this time. Unlike all the big bloated tools out there these days like GitLab and Jira, Trac runs quite well on the cheapest virtual servers you can rent.
Features include:
- Ticketing system
- Milestone tracking
- Time tracking
- Git integration with repository browsing
- Wiki
- Automated notifications
- CI integration
- Low system requirements
About this guide
Most guides or walkthroughs of this sort are very basic. They try to get you there with the least amount of information possible. My approach to guides opposes this philosophy. Advanced users may choose to skip over extra information like firewall configuration, and setting up E-Mail forwarding.
It's assumed the shell commands presented will be run using sudo, or as root.
Prepare your server
Create a Digital Ocean droplet using Debian 9
Creating a server with Digital Ocean is quite straightforward. Trac can run comfortably on the $5/mo small DO droplet. Use my referral link and get $10 of free credit.
This guide was written using Digital Ocean. You may encounter very minor differences during install in another environment. However this guide should still get you there. If not, please let me know.
Configure DNS for your Trac server
An obvious candidate is trac.yourdomain.com. This uses that example domain name. Update DNS so your new domain name points to your server.
You will also need an SPF record, or most mail your server sends will be rejected as spam. This will probably be adequate for your use case:
TXT @ v=spf1 a -all
Update the werver
aptitude -y update
aptitude -y upgrade
Configure hostname and domain name on your server
Override Digital Ocean auto-config of domain name
sed -i 's/^manage_etc_hosts: true$/manage_etc_hosts: False/' /etc/cloud/cloud.cfg
Set the system hostname
cat << EOF > /etc/hostname
trac
EOF
Edit /etc/hosts to set the system domain name
Find these lines
127.0.1.1 example.com droplet
127.0.1.1 localhost
Update for your trac domain name
127.0.1.1 trac.yourdomain.com trac
127.0.0.1 localhost
Do not use simply use your root domain, yourdomain.com. You must have a subdomain prepended, such as trac.yourdomain.com. Otherwise you will have trouble later in the guide, allowing Trac to send e-mail notifications
At this point, reboot your server, and confirm your domain name and hostname remain correct after reboots. Use the shell commands hostname and domainname.
Configure the firewall
Install and enable firewalld
aptitude -y install firewalld
systemctl enable firewalld
systemctl start firewalld
firewall-cmd --zone=public --add-interface=eth0
firewall-cmd --zone=public --add-interface=eth0 --permanent
Protecting SSH
Many people will advise you to jump through hoops to protect SSH on your linux server. Unless you really need SSH available to the whole world (you don't) use my simpler approach. Disallow SSH in your firewall, except for trusted ip addresses. Since the whole internet can't talk to your SSH port, there's no need for elaborate settings and blocking firewalls like fail2ban.
Repeat the following commands for every trusted IP address
# Repeat these commands for every trusted IP address
firewall-cmd --zone=trusted --add-source=1.2.3.4
firewall-cmd --zone=trusted --add-source=1.2.3.4 --permanent
Should you find yourself unable to connect to SSH, because your current IP address has not been added to the trusted list, this is no problem. Just visit your server dashboard at digitalocean.com. Select the Access menu item. You will see a big blue button that says Launch Console. This gives you shell access to your server over the web. Issue the above command to grant yourself access from your new IP address.
Disable SSH to the public internet
firewall-cmd --zone=public --remove-service=ssh
firewall-cmd --zone=public --remove-service=ssh --permanent
Allow websites hosted on your server through your firewall
firewall-cmd --zone=public --add-service=http
firewall-cmd --zone=public --add-service=http --permanent
firewall-cmd --zone=public --add-service=https
firewall-cmd --zone=public --add-service=https --permanent
Get a free SSL certificate free from Lets Encrypt
You want all interactions with Trac and Git to be secure. To do this, enforce https for all your web traffic. You will need a security certificate for this.
Your DNS records must be in place for this step
Depending on your domain registry, and how you manage your DNS records, it can take minutes to hours before your new DNS names appear to everybody on the internet. If you cannot ping your domain name (ping trac.yourdomain.com) you will need to wait a while before completing this step.
Use certbot to request an SSL certificate
Install certbot
aptitude -y install certbot
Stop your web server, if it's running. Certbot will prove you own this domain name by hosting it's own temporary web server. There are other ways to use certbot. Look at letsencrypt.org if you're interested.
systemctl stop apache2
Request an SSL certificate.
certbot certonly --standalone -n --agree-tos \
    -m [email protected] \
    -d trac.yourdomain.com
We will configure the server to use this certificate later. The certificate can be found at:
/etc/letsencrypt/live/trac.mydomain.com/*.pem
Configure a local mail server so Trac can send E-Mails
Install Exim
aptitude -y install exim4
Update the Exim config file to contain these directives:/etc/exim4/update-exim4.conf.conf
dc_eximconfig_configtype='internet'
dc_eximconfig_other_hostnames='trac.yourdomain.com'
Do not specify yourdomain.com as dc_eximconfig_other_hostnames, or mail to @yourdomain.com addresses will never be delivered. Also, if the output of the domainname command is yourdomain.com instead of trac.yourdomain.com, mail to @yourdomain.com will never be delivered. This happens because exim will try to deliver the mail locally, instead of over the internet.
It's a good idea to create a root email alias on your server, so you receive notices from your server.
cat << EOF >> /etc/aliases
root: [email protected]
EOF
Restart Exim to apply the changed configuration
systemctl restart exim4
Check that Exim correctly decides to send mail via the internet.
exim -bt [email protected]
exim -bt yourname
exim -bt root
Send a test e-mail
echo "Test email" | mail -s "testing new server" [email protected]
Watch your logs if there is a problem
tail -f /var/log/exim4/* &
tail -f /var/log/maillog &
journalctl -f &
Install software and dependencies
Install software via Debian packages.
aptitude -y install \
  apache2 \
  exim4 \
  git \
  libapache2-mod-wsgi \
  libmariadb-dev-compat \
  mariadb-server \
  python \
  python-pip
At the moment, Trac does not install properly for me using only debian packages. You'll use a python virtual environment to install the latest version of Trac and associated libraries
Create the project home
mkdir -p /var/www/trac
Spawn a virtual environment
pip install virtualenv
virtualenv /var/www/trac/virtualenv
Activate the virtual environment
source /var/www/trac/virtualenv/bin/activate
Install Trac and dependencies
pip install trac
pip install docutils
pip install babel
pip install pygments
pip install MySQL-python
pip install TracAccountManager
Setup MariaDB
Enable MariaDB
systemctl enable mariadb
systemctl start mariadb
Run the following command and answer the questions. You will set your database admin password here.
mysql_secure_installation
Create a database for Trac, with the following SQL statements at the database prompt. Of course, replace TRAC_DB_PASSWORD with a real password.
mysql -u root -p

> CREATE DATABASE trac DEFAULT CHARACTER SET utf8 COLLATE utf8_bin;
> GRANT ALL ON trac.* TO trac_db@localhost IDENTIFIED BY 'TRAC_DB_PASSWORD';
> FLUSH PRIVILEGES;

# Press CTRL-D to exit database shell
Create a bare Git repository
mkdir -p /var/www/trac/git
git init --bare /var/www/trac/git/myproject.git
Trac Set-up
Initialize a Trac project
# Initalize a trac project
trac-admin \
  /var/www/trac/project \
  initenv project \
  mysql://trac_db:TRAC_DB_PASSWORD@localhost/trac \
  git /var/www/trac/git/myproject.git
Update Trac.ini
Make the following changes to the Trac project config file/var/www/trac/project/conf/trac.ini
Add the following sections
[components]
tracopt.versioncontrol.git* = enabled
tracopt.versioncontrol.git.git_fs.csetpropertyrenderer = enabled
tracopt.versioncontrol.git.git_fs.gitconnector = enabled
tracopt.versioncontrol.git.git_fs.gitwebprojectsrepositoryprovider = enabled
acct_mgr.admin.* = enabled
acct_mgr.api.* = enabled
acct_mgr.db.sessionstore = disabled
acct_mgr.htfile.htdigeststore = disabled
acct_mgr.htfile.htpasswdstore = enabled
acct_mgr.http.* = disabled
acct_mgr.notification.* = enabled
acct_mgr.pwhash.* = disabled
acctmgr.register.* = enabled
acct_mgr.svnserve.svnservepasswordstore = disabled
acct_mgr.web_ui.* = enabled
acct_mgr.web_ui.LoginModule = enabled
acct_mgr.web_ui.resetpwstore = disabled
acct_mgr.guard.accountguard = enabled
trac.web.auth.LoginModule = disabled

[account-manager]
password_store = HtPasswdStore
htpasswd_hash_type = md5
htpasswd_file = /var/www/trac/users.htpasswd
allow_delete_account = false
login_attempt_max_count = 5
user_lock_time = 60
user_lock_max_time = 0
user_lock_time_progression = 2


[git]
shortrev_len = 40
Edit the logo section
[header_logo]
alt = Yet Another Trac Project
height = -1
link = /
src = /chrome/common/trac_banner.png
width = -1
Edit the attachment size limits
[attachment]
max_size = 8388608
max_zip_size = 8388608
render_unsafe_content = disabled
Edit log settings, to log through syslog
[logging]
# log_file = trac.log
# log_format = <inherited>
log_level = WARNING
log_type = syslog
Edit your project settings
[project]
admin = [email protected]
admin_trac_url = trac.yourdomain.com
descr = Name For Your Project
Edit the mail settings to use system sendmail for e-mail delivery. Note, you can also instruct Trac to relay via SMTP if you prefer.
[notification]
email_sender = SendmailEmailSender
smtp_from = [email protected]
smtp_reply_to = [email protected]
Create an empty password file
touch /var/www/trac/users.htpasswd
Generate static files, python cache
To reduce overhead in trac, extract and store static files that can be served directly by Apache.
mkdir -p /var/www/trac/static
trac-admin /var/www/trac/project deploy /var/www/trac/static
Allow for a python code cache
mkdir -p /var/www/trac/python_egg_cache
Configure Apache to serve Trac via WSGI
Enable apache modules
a2enmod ssl
a2enmod wsgi
a2enmod cgi
Set ownership of trac files to the apache system user
chown www-data:www-data -R /var/www/trac
Edit the apache config file. If your server is going to host multiple websites, you may wish to create a new conf file, rather than editing the default one. /etc/apache2/sites-available/000-default.conf
<VirtualHost *:80>
  # Catch all non-ssl requests and redirect them to ssl
  ServerName trac.yourdomain.com
  Redirect permanent / https://trac.yourdomain.com/
</VirtualHost>

<VirtualHost *:443>
  ServerName trac.yourdomain.com

  <IfModule mod_headers.c>
    Header always set Strict-Transport-Security "max-age=15768000; includeSubDomains; preload"
  </IfModule>

  CustomLog /var/log/httpd/yourdomain.com_trac.access.log combined
  ErrorLog  /var/log/httpd/yourdomain.com_trac.error.log

  SetEnv PYTHON_EGG_CACHE /var/www/trac/python_egg_cache

  Alias /chrome /var/www/trac/static/htdocs
  <Directory "/var/www/trac/static/htdocs">
    <IfModule mod_authz_core.c>
      Require all granted
    </IfModule>
  </Directory>

  WSGIDaemonProcess tracweb python-home=/var/www/trac/virtualenv
  WSGIProcessGroup tracweb
  WSGIApplicationGroup %{GLOBAL}
  WSGIScriptAlias / /var/www/trac/static/cgi-bin/trac.wsgi
  <Directory /var/www/trac/static/cgi-bin>
      <IfModule mod_authz_core.c>
          Require all granted
      </IfModule>
  </Directory>

  SSLEngine on
  SSLCertificateFile    /etc/letsencrypt/live/www.yourdomain.com/cert.pem
  SSLCertificateKeyFile /etc/letsencrypt/live/www.yourdomain.com/privkey.pem
  SSLCertificateChainFile /etc/letsencrypt/live/www.yourdomain.com/fullchain.pem
</VirtualHost>
Check your Apache configuration for errors
source /etc/apache2/envvars
apache2 -t
Watch the output of your logs, to detect any problems
journalctl -f &
tail -f /var/log/apache2/*
Start Apache web server
systemctl restart apache2
Log in and configure Trac
Authentication plugin
Open trac.yourdomain.com in your browser. If you've done everything correctly, you should see the introductory WIKI page. Click the Login link, to be taken to the initial authentication setup
Step 1: Choose the following options:
- Convert login names to lower case on registration and login - Checked
- Restrict sending cookies to HTTPS connections - Checked
- Authentication Front-End: Use a HTML login form
- Integrate links to related actions in the login form - Checked
- Allow the user to be remembered across sessions: checked
Steps 2 through 5: No changes to defaults
Step 6, choose your initial login name and password
Anonymous user permissions
By default, website visitors can see basically everything. In the admin menu, you can configure permissions for anonymous users.
Getting started with your Git repository
From your workstation, not the server, clone the repository
git clone https://trac.yourdomain.com/git/myproject.git
Create a README.md file, commit to git, and push back to the server
cd myproject

cat << EOF > README.md
# My Project
I am just getting started with my project!
EOF

git add README.md
git commit -a -m "Add Readme File"
git push
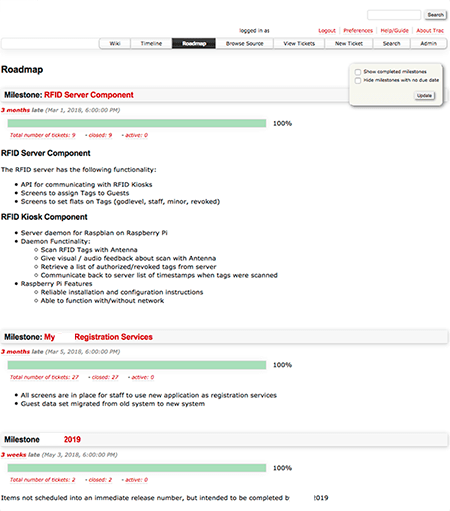
Visit Trac in your browser. You should see the code changes reflected in the Timeline, and Browse Source menu options.
Troubleshooting
Log files are your friends when something goes wrong on your server. You can watch all the relevant logs in real time, to see what errors are given with something doesn't work.
# Linux system logs
journalctl -f &

# E-Mail logs
tail -f /var/log/maillog &
tail -f /var/log/exim4/* &

# Web server logs
tail -f /var/log/apache2/* &